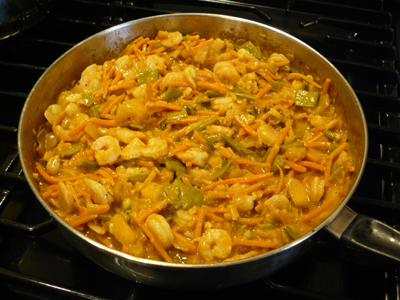
Sushi takes some time to prepare but it's not difficult. Once you learn the process you can have fun experimenting with many different filling combinations. Some of my favourites are shown below.
 Ingredients:
Basic ingredients:
- 2 cups short-grained Japanese-style white rice*
- 2 cups water, plus additional for rinsing
- 1/4 cup rice vinegar
- 4 tablespoons sugar
- 8 sheets nori (roasted, pressed seaweed)
- sesame seeds
Suggested fillings:
- cooked shrimp, tails & shells removed
- fresh mint leaves
- green onion
- cooked crab (or crab-flavoured pollack)
- avocado
- carrot
- smoked salmon
- cream cheese
Serve with:
- soya sauce
- sesame seeds
- wasabi
- pickled ginger
Notes/Substitutions/etc.:
* I have had good results with President's Choice brand Sticky Rice but any short-grained Japanese-style rice should work well.Directions:Prepare the sticky rice:
Rinse rice with water, scrunching the rice around with your hand, until the water coming off the rice runs clear.
Place cleaned rice in a pan with a tight-fitting lid. Cover with an equal volume of water and allow rice to soak for 30 minutes.
While the rice is soaking, dissolve sugar into rice vinegar. You may need to heat the vinegar gently to help the sugar dissolve, but be careful not to boil your mixture. Once sugar is thoroughly mixed in, remove vinegar from heat and allow to cool to room temperature.
Bring rice to a boil, then turn heat down to low and simmer for 15 minutes. Keep the lid on the rice throughout the cooking process -- the steam trapped inside the pan is crucial to cook the rice properly and give it the desired consistency.
Remove rice pan from the heat and allow it to stand -- with the lid on -- for 15 minutes.
Turn rice out into a shallow, wide-bottomed, non-metallic bowl. (The shape of the bowl is important to ensure that the rice cools down quickly and evenly.)
Pour vinegar/sugar mixture over the rice and mix in using a non-metallic spatula or large spoon. Continue mixing vinegar into rice until it is thoroughly incorporated and rice has cooled to room temperature. You can use a hand-held fan to fan the rice while you are mixing and encourage the cooling process.
Once rice is thoroughly mixed and cooled to room temperature, it is best to work with it immediately. If you are not ready to work with the rice yet, leave it in the bowl at room temperature and cover with a damp cloth. Do not refrigerate the rice or allow it to dry out.
Assemble the sushi:
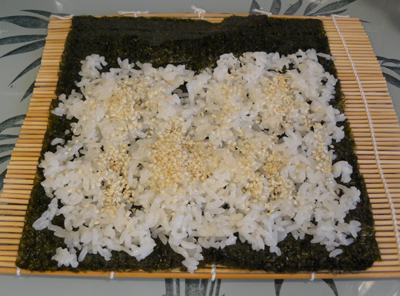
Place one sheet of nori onto a bamboo sushi rolling mat.
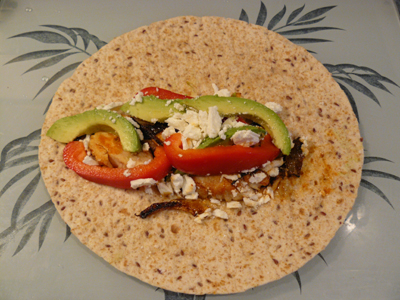
Spread a thin layer of rice over the nori, leaving the far edge of the nori bare.
Sprinkle sesame seeds over the rice.
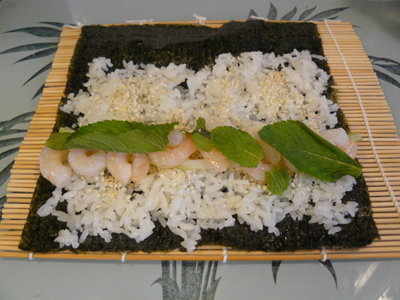
Arrange your desired fillings in a thin line on top of the rice, approximately 1/3 of the way in from the near edge. Many wonderful combinations of seafood and vegetables are commonly used to prepare sushi. Here are some of my favourites:
Shrimp, fresh mint, and green onion:
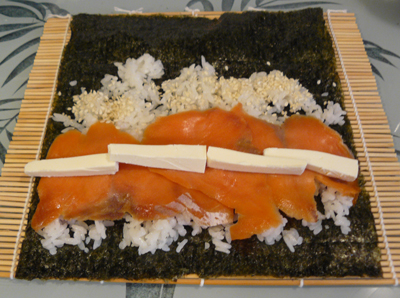
Smoked salmon and cream cheese:
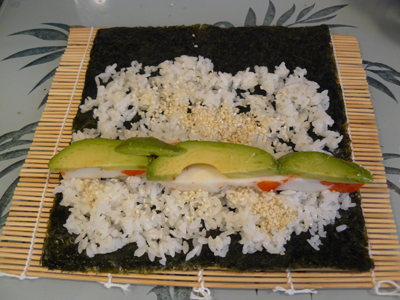
Crab and avocado:
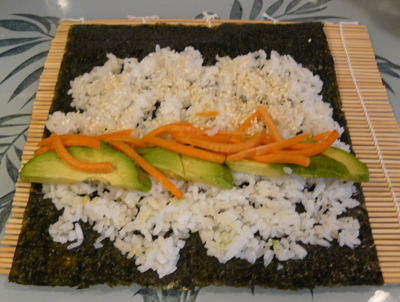
Avocado and carrot:
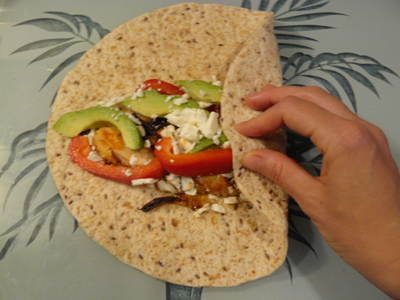
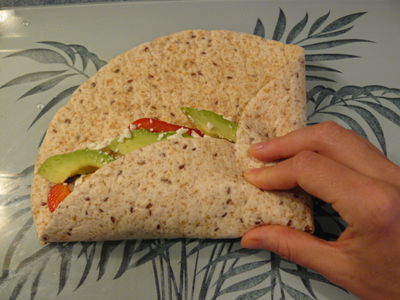
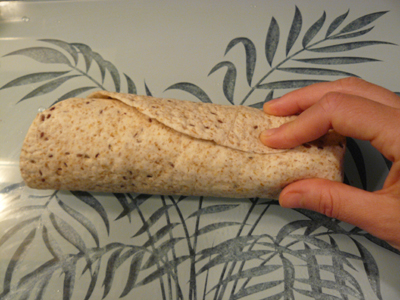
Starting at the edge closest to you, use the bamboo mat to roll the sushi. Apply gentle pressure with your hands to the outside of the rolled mat to ensure a nice, tight sushi roll.

Remove the bamboo mat from the outside of your sushi roll and slice roll into bite-sized pieces with a sharp knife.
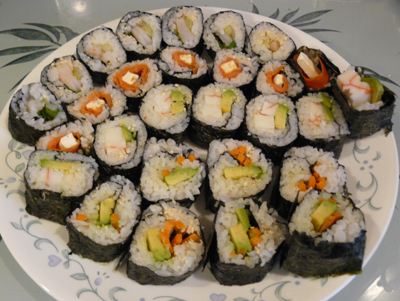
Arrange sushi pieces on a platter, with the fillings displayed.
Serve with pickled ginger, wasabi, soya sauce and sesame seeds on the side.